Methods

2%

Review and Herald Publishing Association · Tacoma Park Station, Washington, D. C. · Oct 8, 1908

FromReview and Herald, Vol. 85, No. 41.

Read the full edition

Methods

Manual Training for Our Primary Grades—No. 2
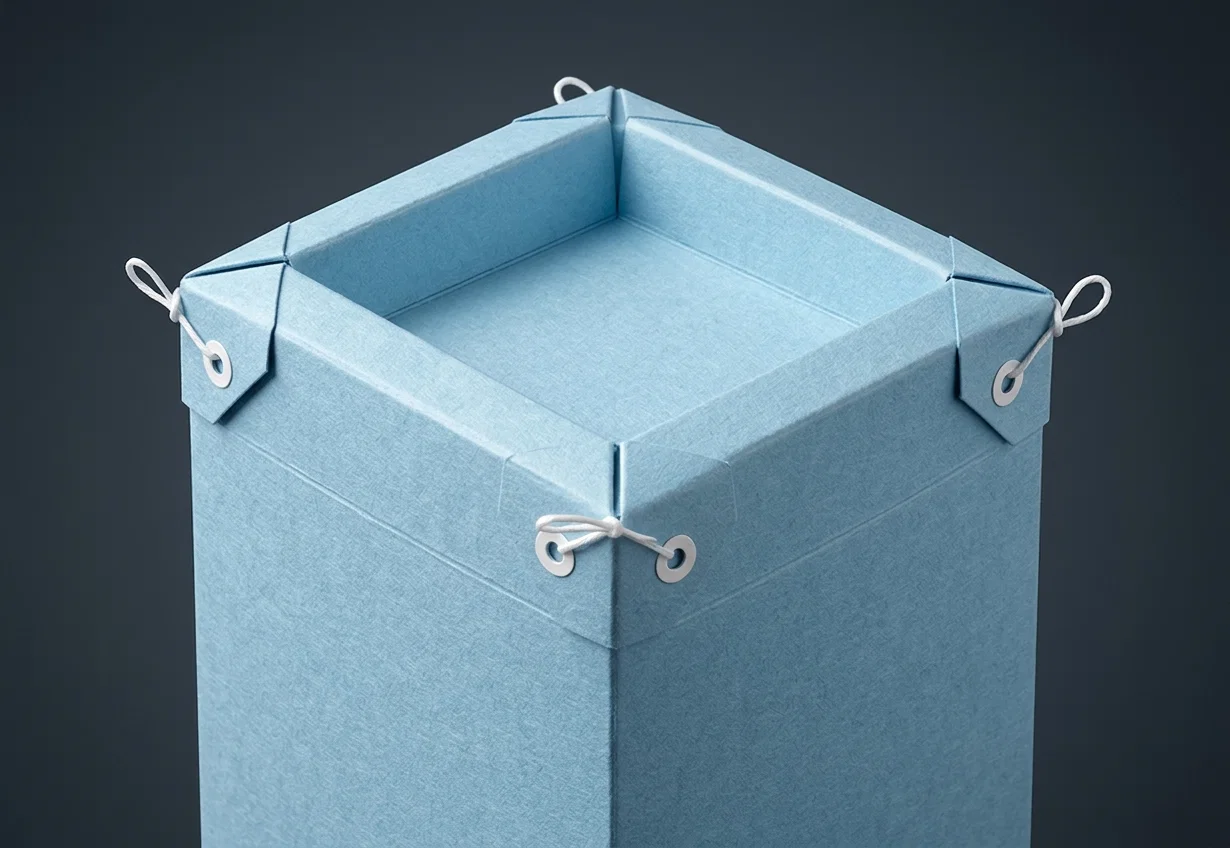
Model No. 3
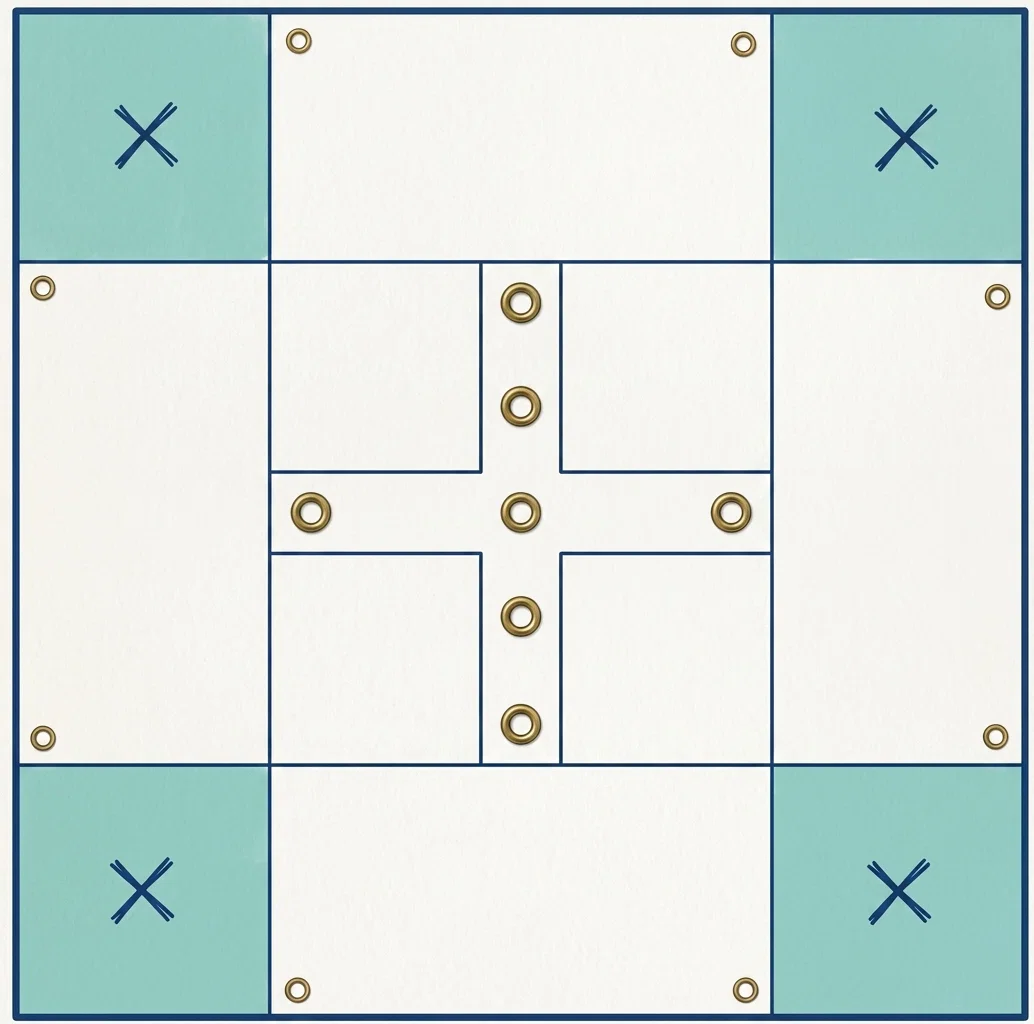
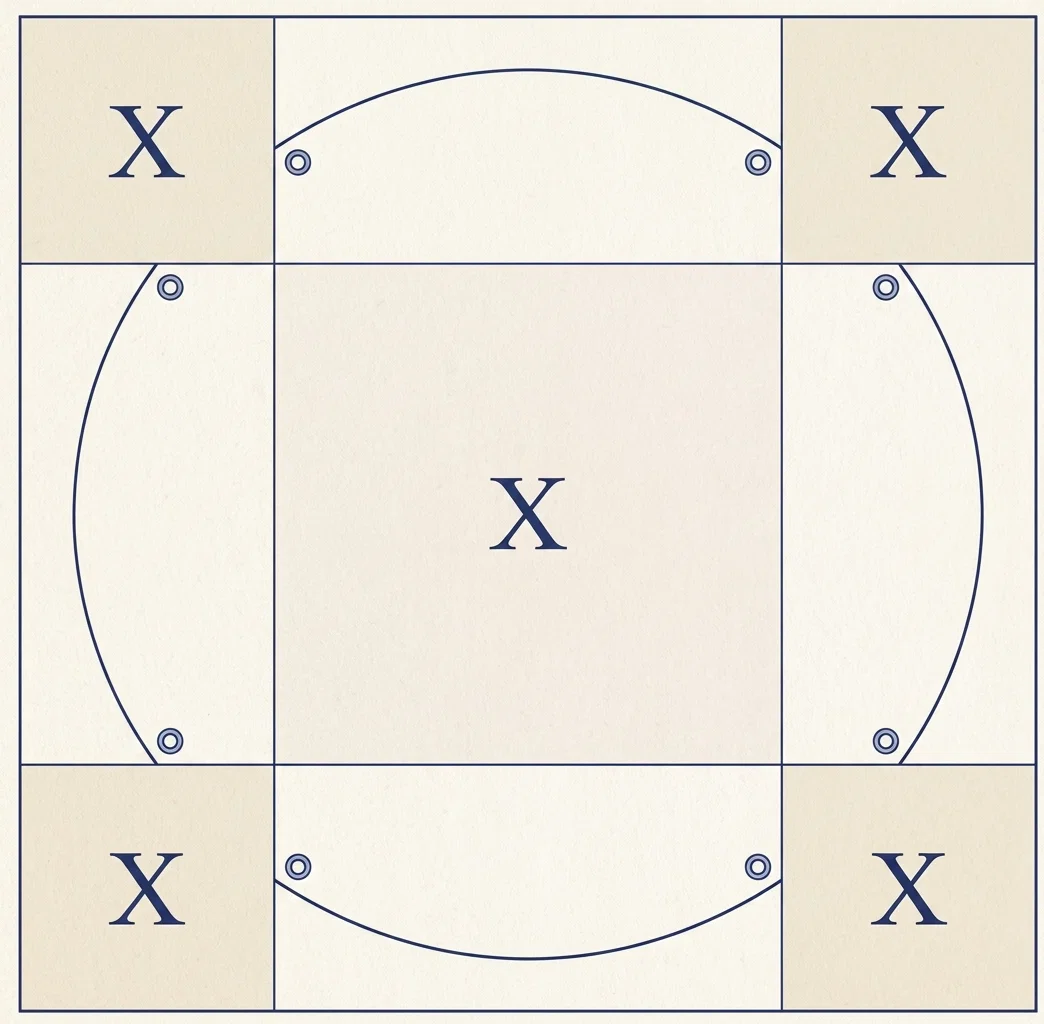
This is a square box. For the drawing, first make a point two inches from each corner on each side of the paper.
MODEL NO. 3
MODEL NO. 3
Connect opposite points with straight lines (Fig. 1). Mark the places for tying, as indicated by the small circles, or rings. Cut away the parts marked X.
FIGURE I
FIGURE I
In cutting, be careful to stop exactly at the intersection of the lines. Fold the remaining lines. To insure a good fold, teach the children to lay the edge of the ruler along the line that is to be folded, then, holding it firmly in place with the left hand, lift up the free part of the paper with the right, and press it closely against the edge of the ruler. The fold may be made sharper after removing the ruler. Tie so that the corners just meet. This makes a good handkerchief box.
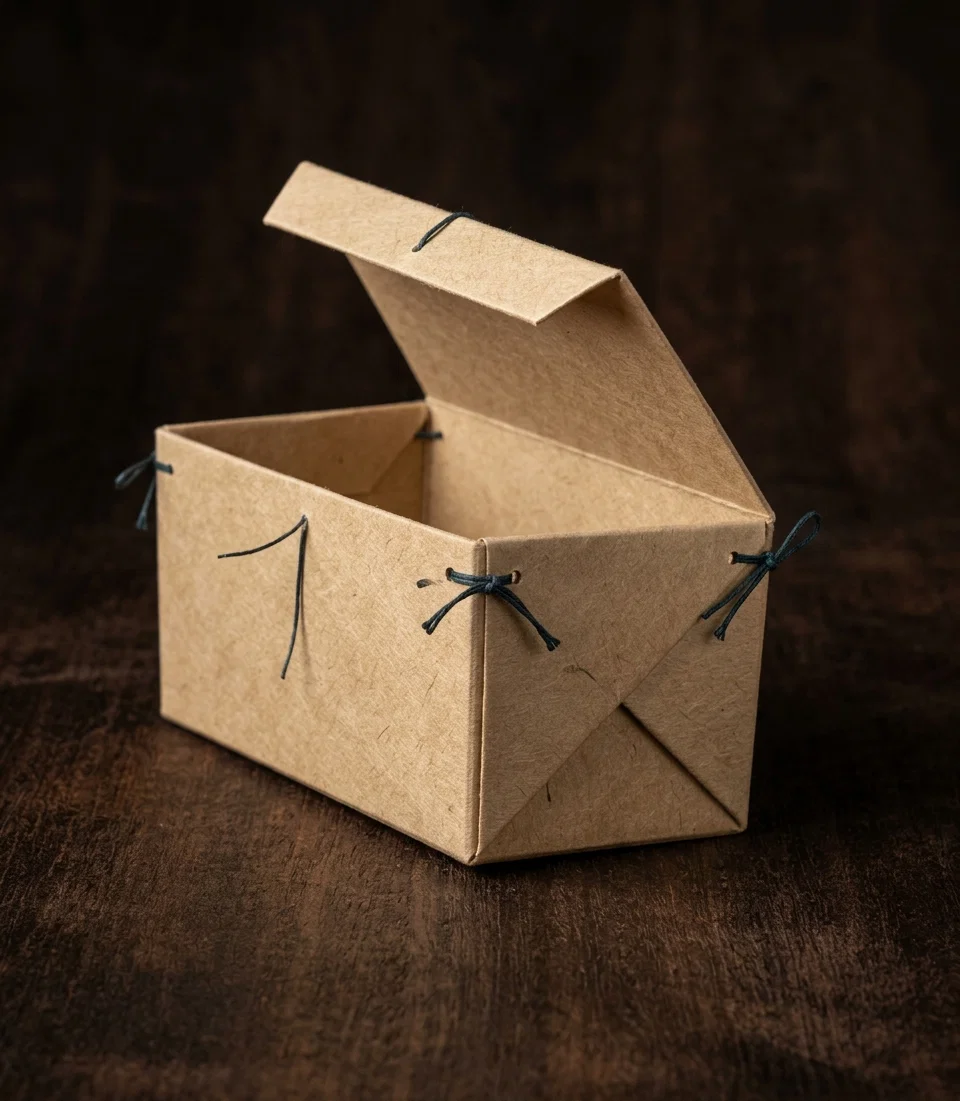
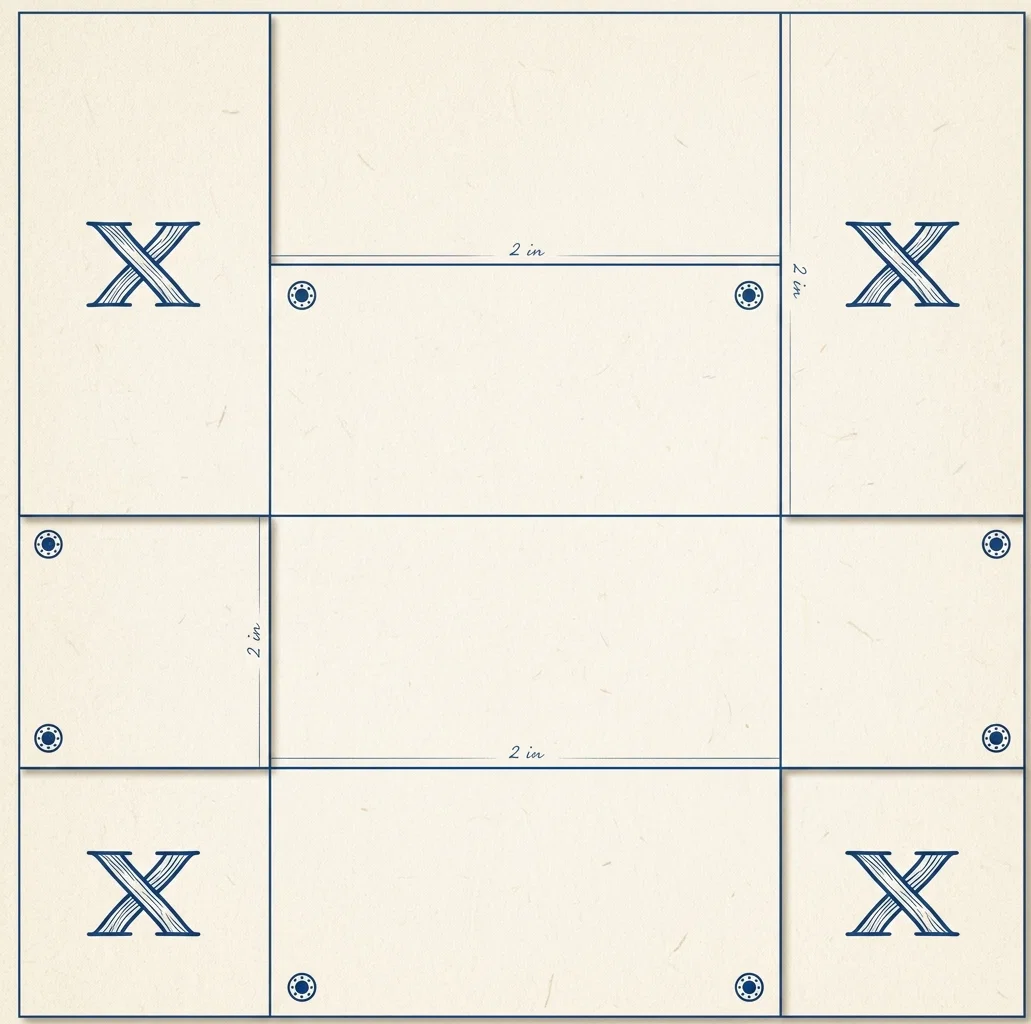
Model No. 4 Is an oblong box with a cover. A two-inch measurement is used in locating all the lines shown in the drawing. (Fig. 2.) Locate and draw the upright lines first.
In each case mark the places for tying, cut away the parts marked X, fold the straight lines, and tie, the same as directed for Model No. 3.
MODEL NO. 4
MODEL NO. 4
If you wish to fasten the cover of this box down, attach tie-strings to the center of the front edge of the cover, and to the upper edge of the front of the box.
FIGURE 2
FIGURE 2
The cord which comes around store packages may be wound into neat little rolls, and kept in the boxes, ready for use when wanted.
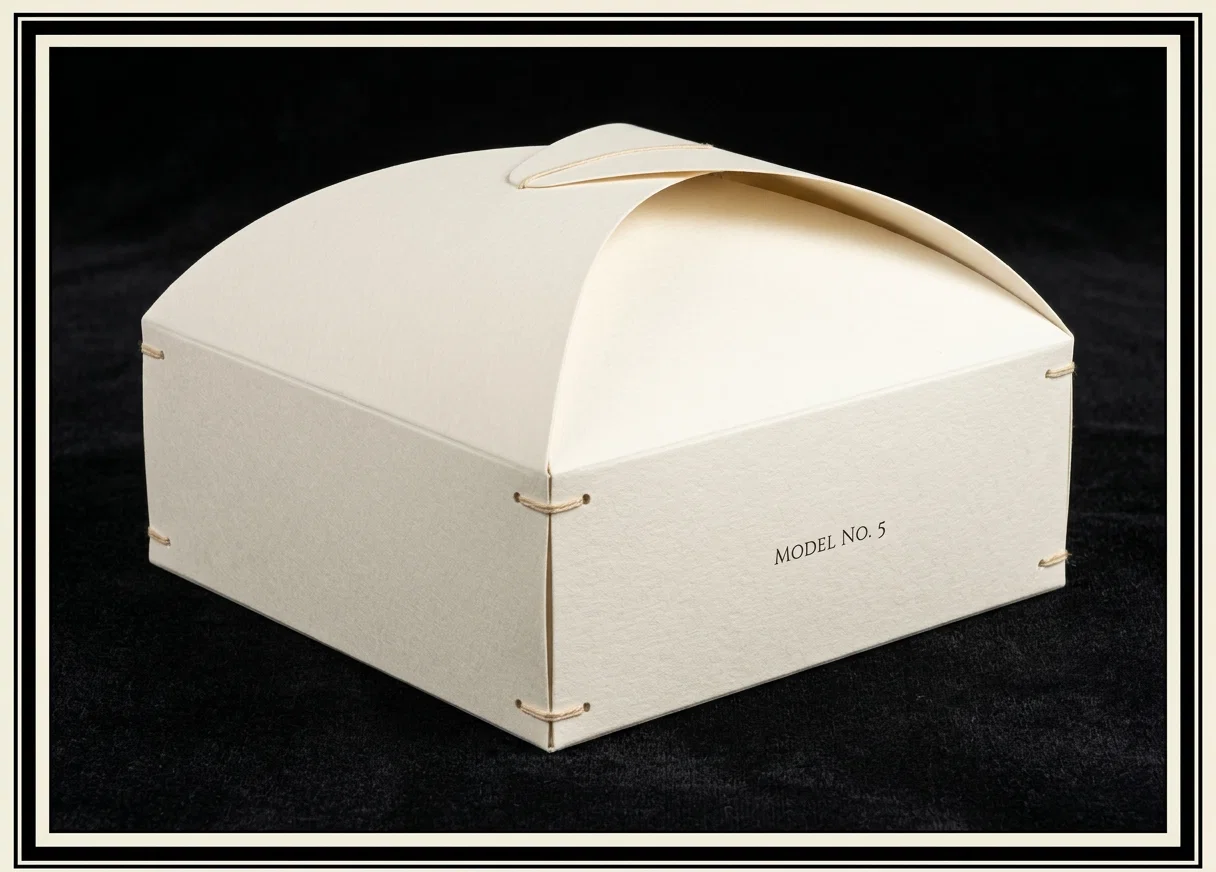
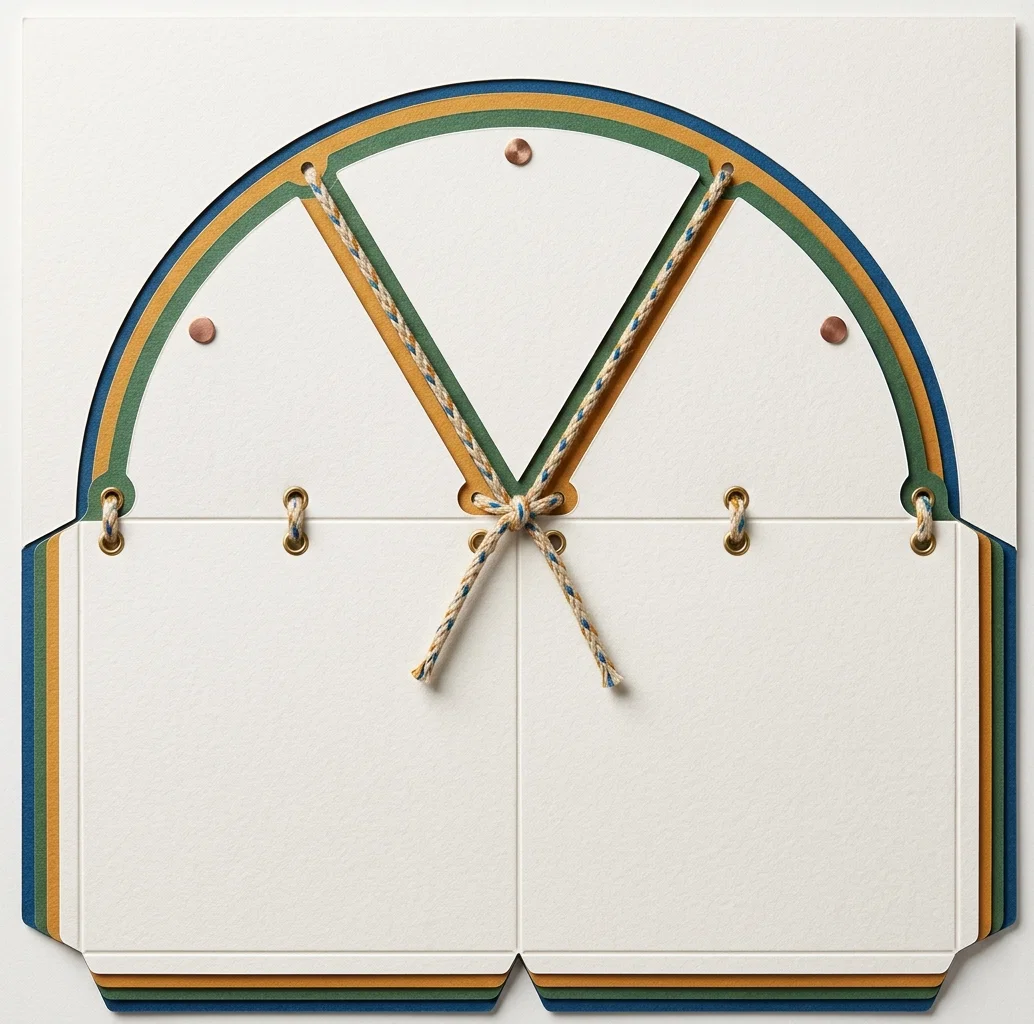
Model No. 5 Is another square box, but instead of a straight, it has a curved top. The straight lines are located the same as for Model No. 3. Then find the center of the paper, by placing the ruler across diagonally, so that it just touches the corners, and draw a very short line as near the center as you can by the eye. Place the ruler across in the opposite direction, just touching the other two corners, and draw another short line. This should cross the first one, and the point of intersection will, of course, be the exact center of the paper. (Fig. 3.)
MODEL NO. 5
MODEL NO. 5
With a radius of three and one-half inches,—that is, with the compasses open that distance,—place the point at the center of the paper. It may slightly prick the paper, so as to keep it from slipping out of place while the pencil revolves around it.
FIGURE 3
FIGURE 3
Hold the compasses lightly, by the very top, and with the thumb and forefinger only. Use very slight pressure, and let them lean slightly in the direction in which they are moving. Beginning on one of the lines, move the pencil point steadily from left to right, across the paper until it touches the corresponding
line on the opposite side. Let this movement be accomplished by rolling the top of the compasses between the thumb and forefinger. Begin and end exactly on the lines. Repeat on the three other sides.
FIG. 4
FIG. 4
If you have not compasses, you can make a substitute that will answer the purpose just as well. All that is needed is a strip of thin cardboard, one fourth of an inch wide, and four inches long. A strip cut from one side of a postal-card will do nicely if one side is free from writing. Make a point one fourth of an inch from one end in the center of the cardboard. Mark this O. (Fig. 4.) Measuring from this point, make points one, two, three, and three and one-half inches above, along through the center of the cardboard. Mark them as you see in Figure 4.
Take a common pin, and perforate each point by pushing the pin through to its head. Your pencil should be kept so well sharpened that the point will pass through these perforations. Put the pin into the one marked O, let it slightly prick the paper in the center to prevent it from slipping. Hold the pin upright with the left hand. Put the pencil point through the perforation marked three and one-half inches, and draw the curvedlines as directed above. Of course it is important that the cardboard compasses should be kept flat on the paper. A little practise will enable the children to do as good work with this simple instrument as with an expensive one.
Mark the places for tying. Cut out the corners as marked. Give special directions and cautions for the cutting of the curved lines. It will be much more difficult to secure smooth curved cuts than straight ones, but do not lower the standard. Teach the children to take pride in doing their work well. Remind them to open the shears wide, and make long, steady cuts. It is also better to steady the right arm against the body, and with the left hand swing the paper slowly around to meet the shears.
Teach the children to test the smoothness of a curved edge by passing the finger-tips lightly over it. The irregularities can be felt even better than seen. Also show them how to further test their work by the corners, which should fit together perfectly when folded and tied.
Do these things seem unimportant? They are not unimportant to the children. They are forming habits of accuracy or inaccuracy, of efficiency or inefficiency, of thoroughness or slackness, and consequently are laying the foundation of success or failure, and it rests largely with you to say which it shall be.
Model No. 6
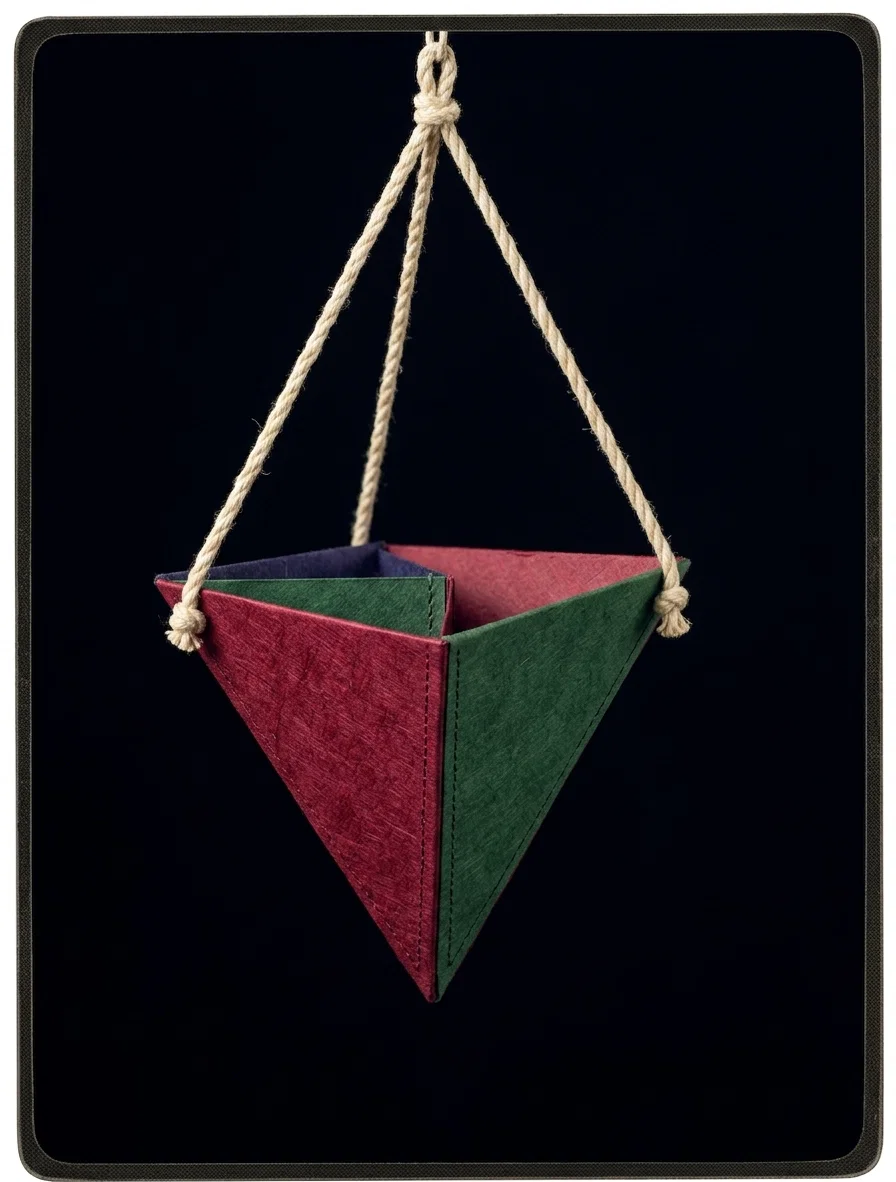
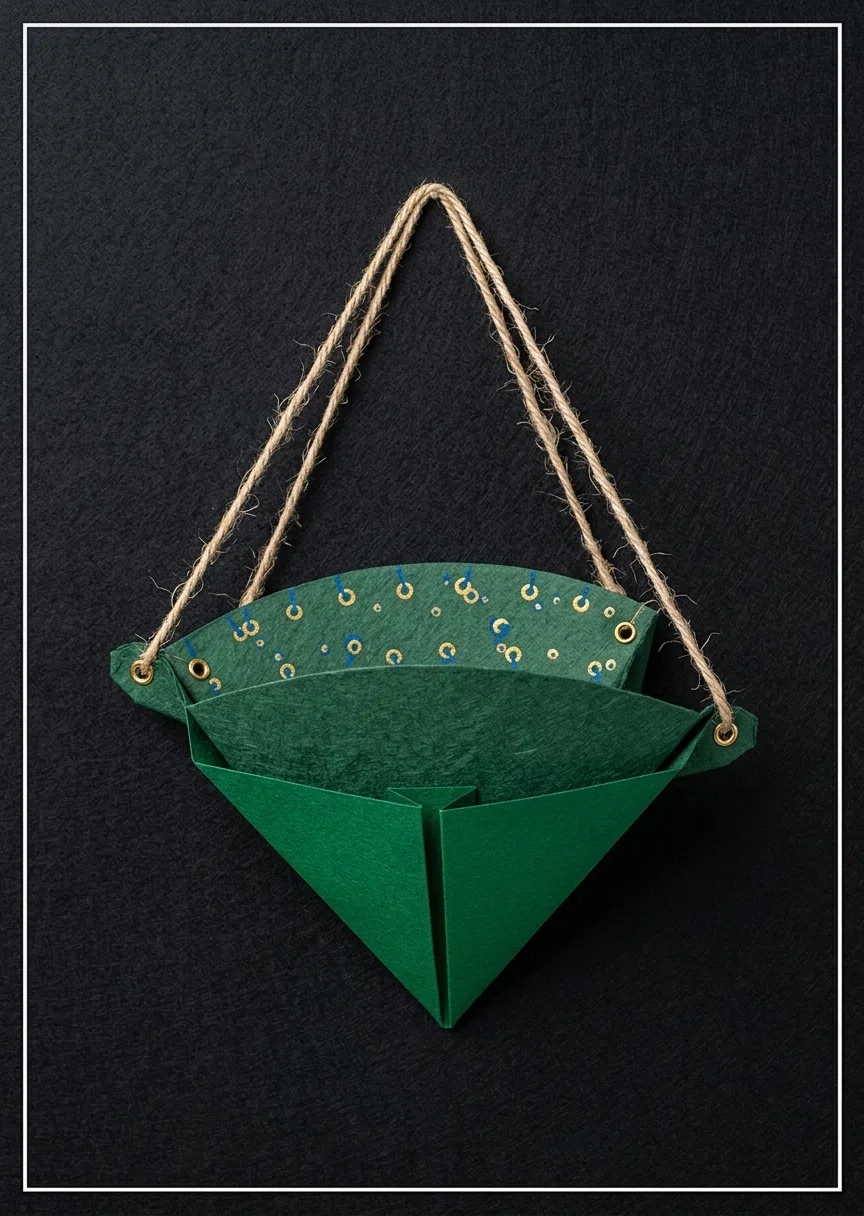
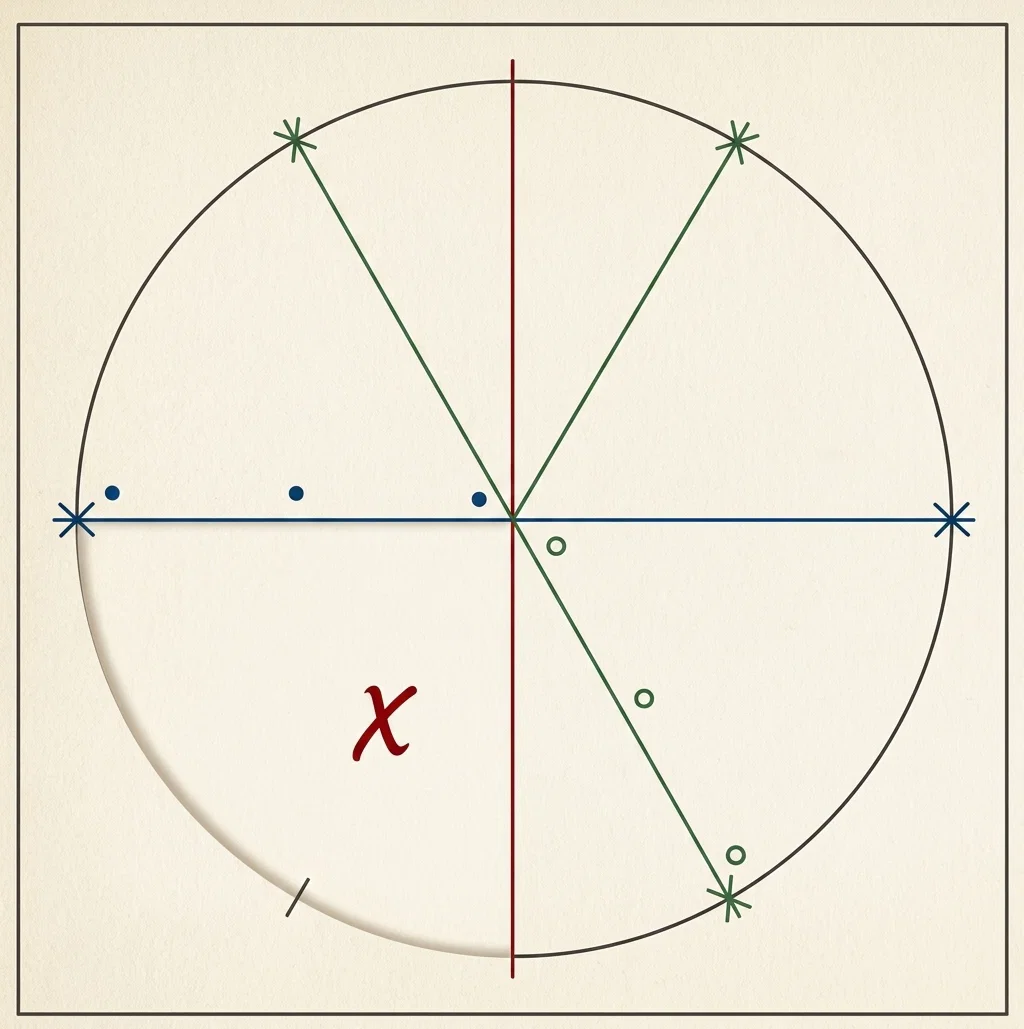
This is a triangular hanging-basket. Make a point in the center of opposite sides of the paper, and connect with a straight line. Mark the center of the line with a point. With this point for a center, and a radius of three and one-half inches, draw half a circle above the line. (Fig. 5.) To divide this into three approximately equal parts, place the point of the compasses at one of the points where the curved line meets the straight one, and mark off the length of the radius on the curved line. Repeat on the opposite side. Make a distinct point where each of these short lines intersects the curved one. Connect these points with the center. Mark the places for tying, and cut out the half-circle. Examine carefully the curved edge to see if well cut. Fold on the lines. Tie and attach handles.
FIGURE 5
FIGURE 5
MODEL NO. 6
MODEL NO. 6
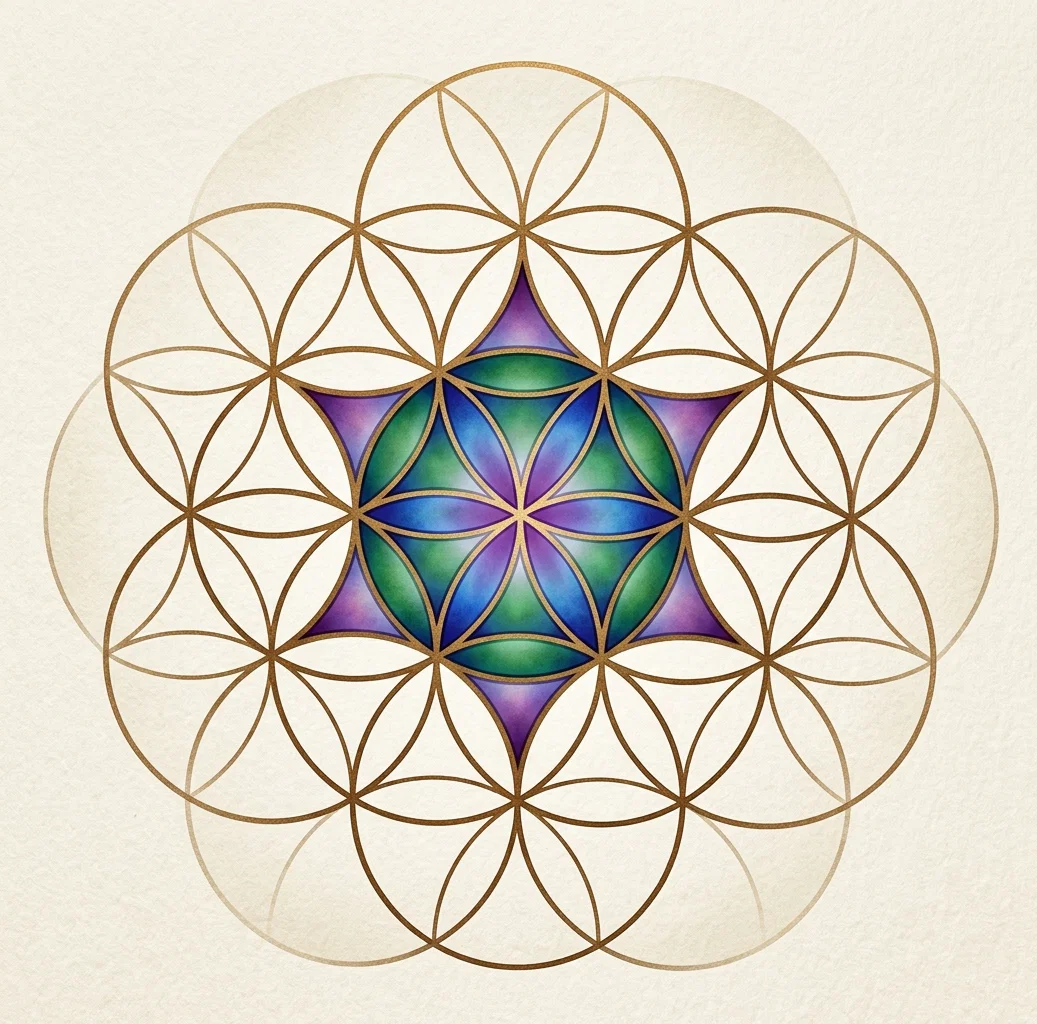
Figure 6 is an exercise in drawing circles. Spend whatever time may be necessary to make the children proficient in this.
FIGURE 6
FIGURE 6
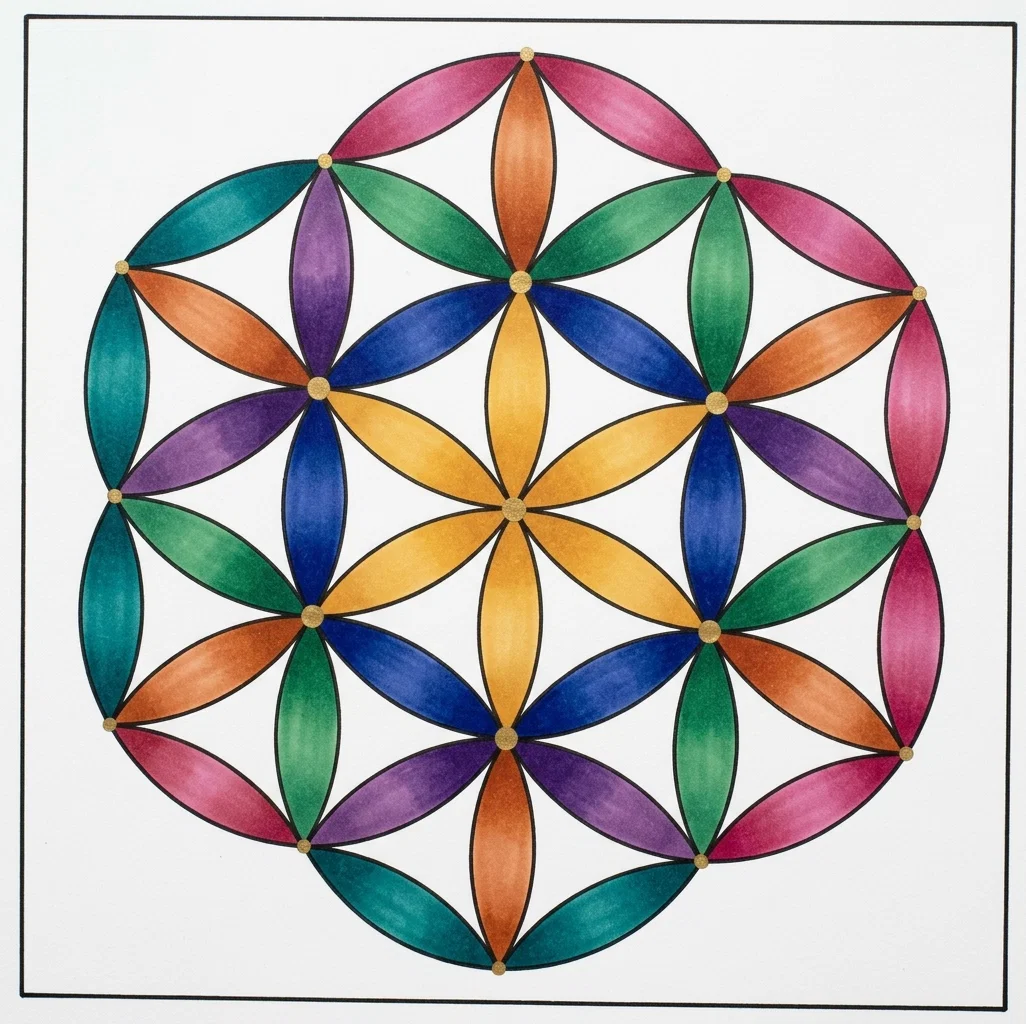
Find the center of the paper, as directed for Model No. 5. With a radius of two inches draw a circle around this center. Place the ruler across the circle, so that the edge just touches the center, and make a point in the circumference at each side just where it is crossed by the ruler. With the same radius that was used in drawing the circle,
the point of the compasses at one of the points just made, and measure off the length of the radius on the circumference at each side of the point. Repeat on the opposite side of the circle. This divides the circle into six approximately equal parts. The children learn very readily to do it, so that after one or two lessons it is only necessary to ask them to divide their circle, and no help need be given.
MODEL NO. 7
MODEL NO. 7
Still with the same radius, and using the six points as centers, draw a circle around each. Each of these circles should pass through the center of the first one. The next row is made up of part circles, with the points where the first row of circles cross each other used as centers. This work will just reach across the paper. If desired, the outline may be cut, thus forming a lamp-mat.
Model No. 7 Is a square hanging-basket. The drawing shown in Figure 7 is made with a three and one-half inch radius. Divide the circle as directed above. Draw two and one-half diameters, as shown. Cut out the circle, then cut away the part marked X. Fold, tie, and attach handles.
FIGURE 7
FIGURE 7
FIGURE 8
FIGURE 8
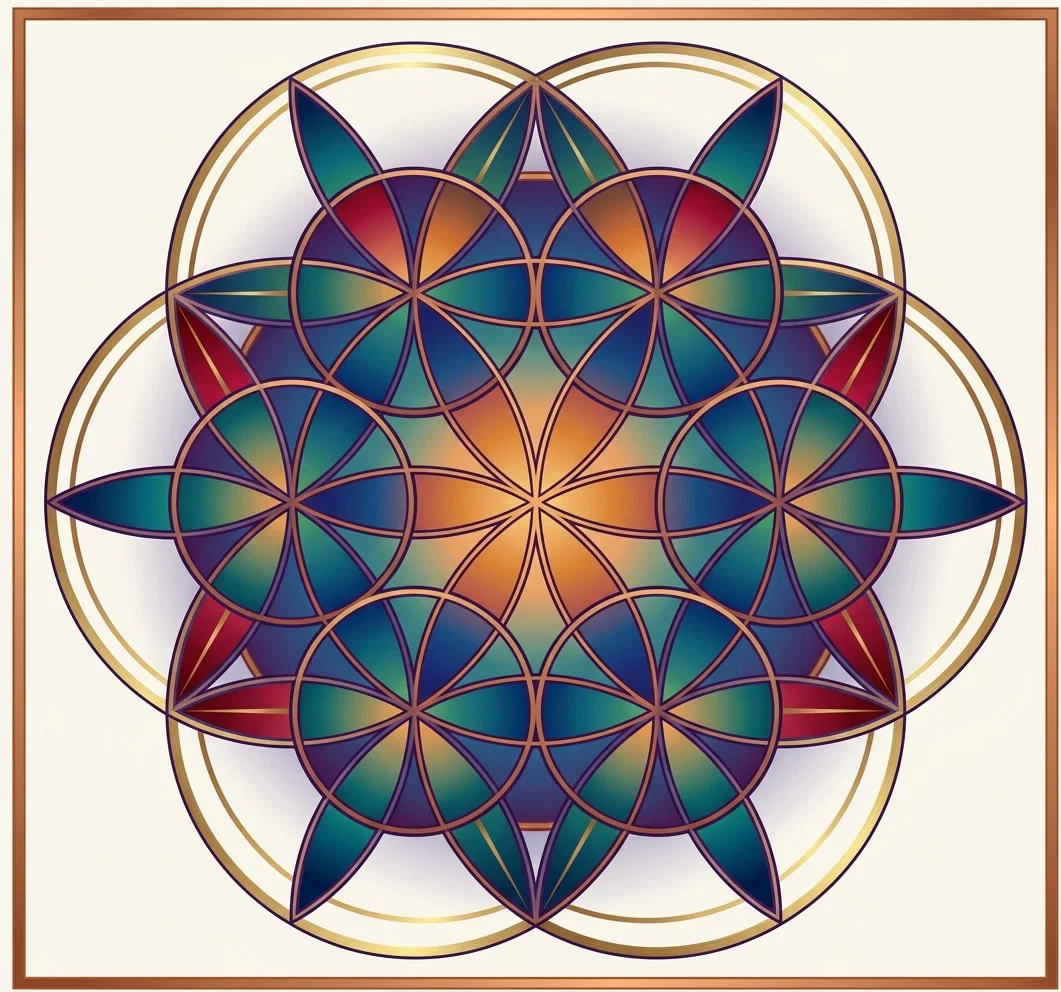
Figures 8 and 9 are practise exercises. Figure 8 is made with a one-inch radius only. Figure 9 uses first a two-inch radius, and then a one-inch.
MRS. E. M. LONG.
FIGURE 9
FIGURE 9